
Designing a Carbon Stanchion

A couple of times, I wanted to design a stanchion that blends with the boat that I was working on. Particularly, stanchions that match the overall shape. But as we all find at work, there’s always something to do first right?
Stainless steel stanchions along the deck really bothered my eye. Nothing wrong with them and they are typical products, probably economical, and yes, they also do their job, with bolts in roughly 42 holes.
A stanchion might not be a major part, but repeat it along both sides and it certainly contributes to the boat’s overall appearance. If you’re buying a custom yacht or boat, ask the manufacturer. They’ll come up with something.
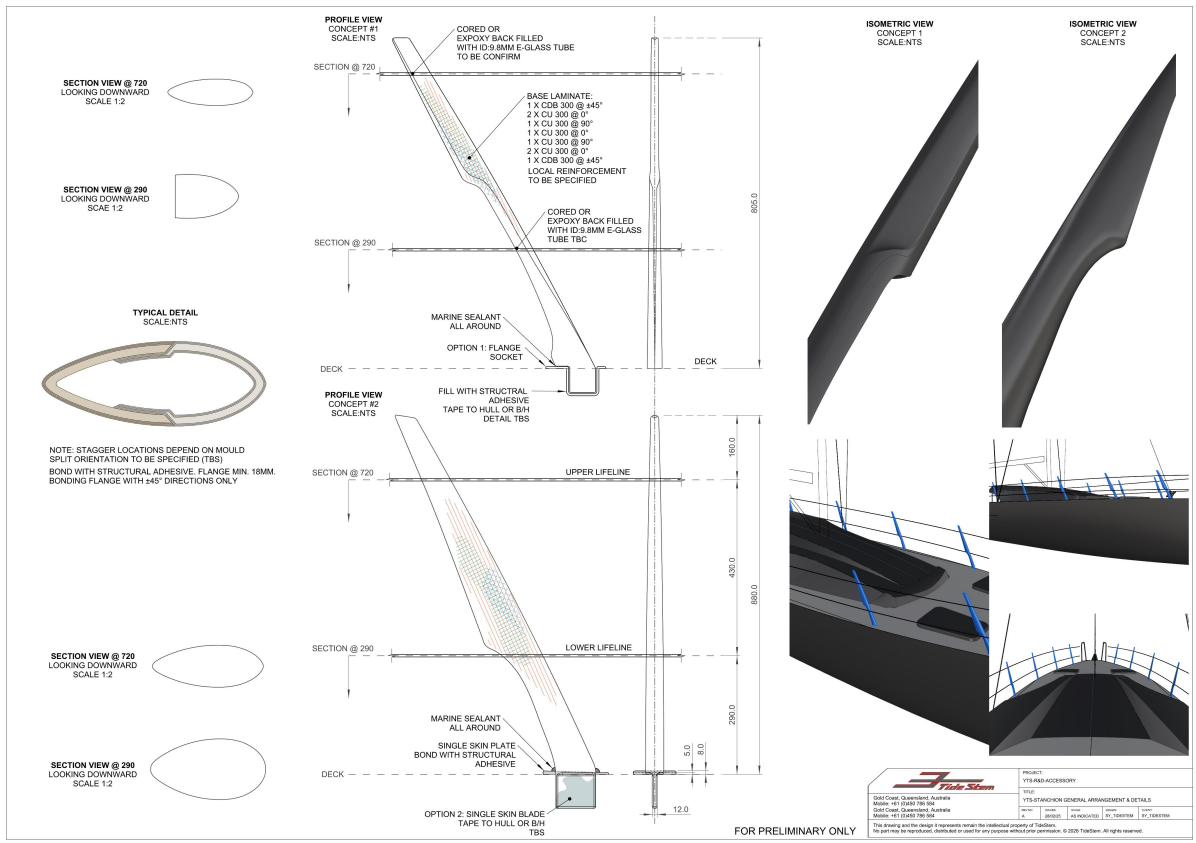
I’ve often thought a yacht looks like a fancy bow laid on its side. That was my starting point for this design project. From there, I set the couple of lengths limits such as overall height length and the maximum and minimum widths, and then started mixing an airfoil shape.
While sketching, I mainly focused on the side profile lines, as that’s where the overall shape would be most visible. I developed a continuous line that curves inward through the middle, adjusting the depth and position until the proportions felt right.
Too much shaping could make it look awkward and difficult to manufacture. I kept coming back to three things: getting the shape I wanted, leaving enough room to laminate it properly, and lastly, making the structure and fixing method work with the design.
Working with composites doesn’t guarantee a good result every time. Getting consistent results takes care. Fibre orientation, resin content and the curing process all influence the finished part. And when I talk about quality, I don’t just mean weight or strength. In this case, I also mean consistency. If I make the same part again and again, let’s say a minimum of 12, how closely can I reproduce them?
For this stanchion, I’ve chosen to make two separately infused halves and bond them together. (Considering making the cap separately)
You don’t usually see the mould when you look at a finished product, but when you’re designing with manufacturing in mind, it has a considerable influence on the shape, and sometimes, making the tooling more complicated makes the actual work easier.
For this design, I considered release directions, access for laying the reinforcement and whether internal bagging would be appropriate and easy at the same time. I eventually settled on separately moulded halves as the basis for the manufacturing plan, but haven’t yet fully decided which orientation to split them in and whether to partly fill or use a form.
I enjoyed designing this stanchion, but there are still a few things I’d like to work through before I’m happy with it. To be continued
Leave a Reply